
Easy Lacto-Fermented Pickles Recipe

With our vegetable garden in full production mode and weekly CSA veggie shares from the Roots and Shoots farm we are getting quite a few perfect pickling cucumbers every week. So I thought I would share a recipe for Polish dill pickles in brine or in Polish – ogórki kiszone (oh-GOORR-kee kee-SHOH-neh). Those are not your typical vinegar cukes from the grocery store, instead they are… lacto-fermented pickles (of course 🙂 ) This means that they are full of good probiotic bacteria, vitamins, minerals and enzymes. In Poland in almost every household people prepare a lot of jars of brined pickles and then keep eating them until next summer. Yesterday I met with my friends from a local Holistic Moms group, we talked about different ways of preserving summer goodness and I promised to share my easy lacto-fermented pickle recipe on the blog so here it is…
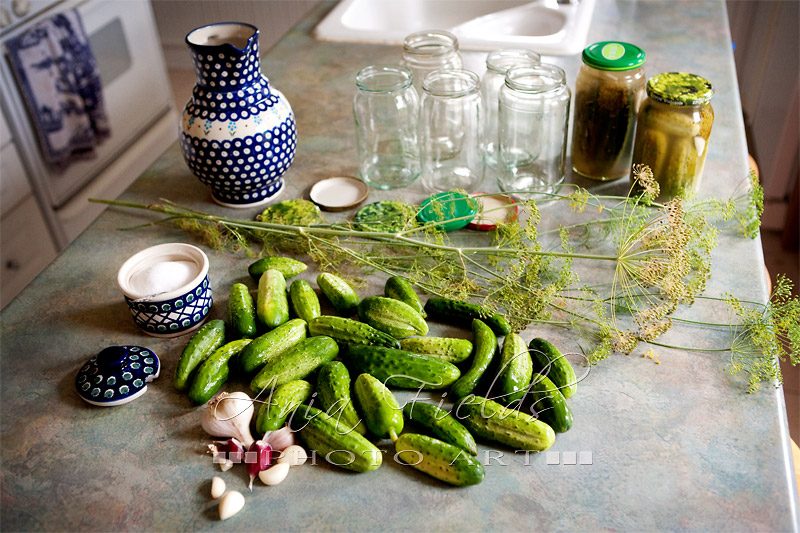
Supplies:
- quart glass jars (or larger) with lids
Ingredients:
- pickling cucumbers – The best are small and medium ones and the best source is your own garden or organic. I think that the quality of cukes is really important, I tried twice to use store bought cucumbers and they didn’t turn out well
- 2-3 garlic cloves per jar (sliced in half)
- 2 dill stems with seeds per jar
- sea salt (1 table spoon per quart of water)
- filtered or spring water
Optional:
- mustard seeds (1 teaspoon per jar)
- a piece of horseradish root
- oak or sour cherry or raspberry or black currant leaves (3 -5 per jar)
HOW TO MAKE POLISH LACTO-FERMENTED DILL PICKLES
1. Start with washing the cucumbers with cold water and the jars with lids well with hot water. Some people recommend sterilizing the jars with boiling water and I do that sometimes, too.
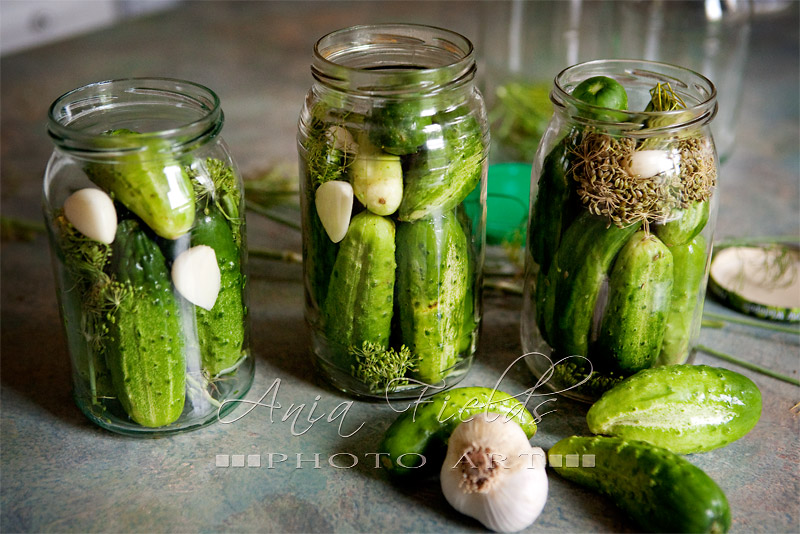
2. Put one dill stem with a seed head on the bottom of each jar.
3. Place cucumbers in jars making sure that they are tight and cozy 🙂 . This is probably the most difficult part of the entire process, it’s kind of like making a puzzle, everything should fit well.
4. Add 2-3 sliced garlic cloves and one more dill head to each jar. Optionally you may add a teaspoon of mustard seeds, a few leaves or a couple of pieces of horseradish root. I especially love using oak leaves because the tannins in them help the pickles stay crunchy throughout the winter.
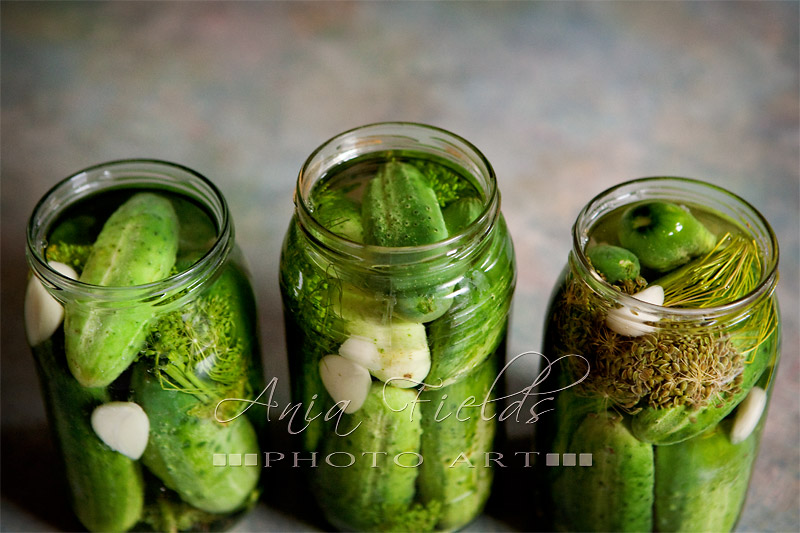
5. Dissolve the salt in filtered water, about 2 teaspoons per quart. You’ll need enough water to fill all the jars you are preparing. In season I usually make 1-3 jars at a time (as the cucumbers keep ripening in my garden) and for that I need between 1-2 quarts of hot salted water.
6. Turn off the water after it boils and pour hot into the jars to fill them almost to the brim. The cucumbers must be submerged fully, they should be tightly placed and shouldn’t float above the water level (otherwise they may spoil).
7. Cap the jars very tightly, turn them upside down and leave on the counter for 1-2 days. I discovered that when I use hot water and then flip the jars they don’t leak. I didn’t do that before and for several days I had to keep wiping the brine that was oozing from the jars as the fermentation started to take place. Now, when I turn them upside down, they are always dry.
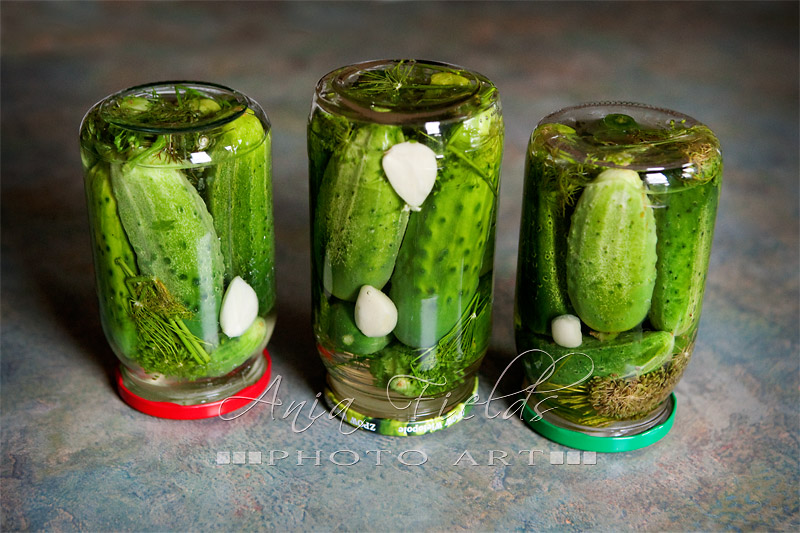
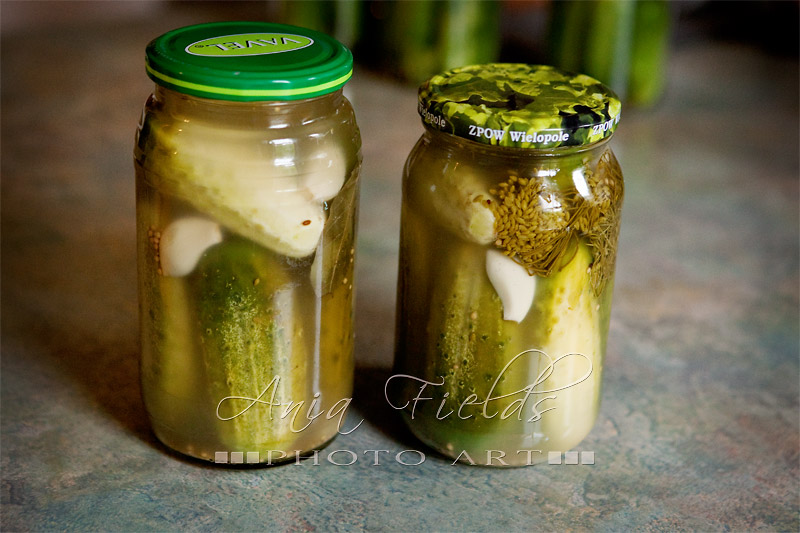
8. After a couple of days you’ll see the color changing and the brine will turn a little cloudy like in a photo below. This is all good! You may then place them for longer storage in the basement, pantry or some other cooler place. The pickles prepared that way will last until spring or even the following summer. When you open a jar and start eating your lacto-fermented pickles you’ll have to place it in the fridge afterwards.
Following exactly the same lacto-fermented pickles recipe you may also prepare a batch for an immediate use. In Polish these are called ogórki małosolne, which literally translates as “lightly salted pickles”. I always do that with the first cucumbers of the season. For that I use a ceramic container instead of jars with lids. It’s very important that during fermentation the cucumbers are fully submerged in brine. They do like to float to the top so it’s important to press them with a small plate or a tiny jar filled with water or a zip-lock bag filled with some water. These pickles are good to eat after 3-4 days. You can ferment them on the counter for up to 5-6 days and then put them in the fridge. They’ll be crunchier and less salty than those from the jars. Here is a photo of my first batch… We love them as a snack, in sandwiches, salads or as a side dish with any meat.

I hope that you’ll try my easy lacto-fermented pickles recipe and will like the results. Let me know if you have any questions, I’ll be glad to help. 🙂 And if you like the results you may try my other lacto-fermented recipes for kombucha, beet kvass, lacto-fermented vegetables or water kefir. Enjoy!
click here to check out more delicious recipes
come visit my website
say hello on Facebook
call me: 608-643-2642
Thanks for sharing! I always thought lacto fermented meant something to do with lactose in dairy.
This is exactly how my grandma “babcia” in Poland used to do it.
One question, you don’t have to use pressure canning?
A lot of people think the same 🙂 but no there is no dairy involved, although sometimes here in US I do see recommendations for using some whey. I never do though…
No, you don’t. The beneficial bacteria creates pressure in jars. I just close them tightly and turn upside down for a few days. After that you can store them with lids up for many months.
This looks yummy. Never tried making pickles this way. I have always used 50/50 vinegar/water mix and water bathed mine to seal and store through winter. Thanks for the idea, will try next year when fresh produce starts coming in from the garden.
I started doing peppers this way, but still add vinegar to help with the acid mix.
Celery juice is anti-bacterial and have seen it used as the brine to make anything a lacto-pickle.
These are yummy Vivika, and so easy to make, it’s worth giving them a try. The most important part is to have good quality pickling cucumbers. If you have your own garden this is the best source 🙂
Heidi sent your blog out this week and I think I am going to try making these with the pickles I get from my CSA. One question though, does it have to be sea salt or could a person use regular canning or pickling salt?
Thanks!
I’ve always used sea salt so I’m not 100% sure about other salts. I googled “canning salt ingredients” and it looks like this is just pure salt without any other additives or anti-caking agents, so it should work great. Good luck!